Tutorial for SPSS Recoding into Different Variable, tutoriel & guide de travaux pratiques en pdf.
Recoding Same Variable
Now that you have mastered the art of creating new variables, you need to recode them to address our research question about gender and party identification. For party identification, we will make the assumptions that independents who lean toward a political party are similar to weak party identifiers, and people who support other parties are independents.
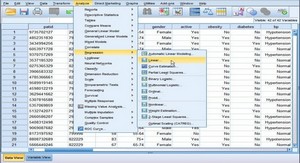
- Click Transform -> Recode -> Into Same Variables…
- Highlight the new party identification variable (PID1) then click on the run arrow. This will move PID1 into the box for Numeric Variables.
- Click Old and New Values. This will take you into the screen for Recode into Same Variables: Old and New Values.
- On the left side of the screen, the box is labeled Old Value. In the box labeled Value, type the number of the value you wish to change. In the box labeled New Value, type the new value you want to assign it. Click Add after each old value has been assigned a new value. The change will appear in the box Old->New.
- Once you have recoded the variable, click Continue. You will return to the previous screen. Then click OK
Practice:
- Recode EDUC into fewer categories.
- Recode the categories for “No formal schooling” (0) through “8th grade” (8) into 1.
- Recode “9th grade” (9) through “11th grade” (11) into 2.
- Recode “12th grade” (12) into 3.
- Recode “1 year of college” (13) through “3 years” (15) into 4.
- Recode “4 years” (16) into 5.
- Recode “5 years” (17) through “8 years” (20) into 6.
[Hint: In screen for Recode into Same Variables: Old and New Values, highlight values in box for Old -> New then use the Remove to delete the values assigned for PID1.]
Recoding into Different Variable
There is one very useful shortcut to creating a new variable from an existing variable through recoding. We could simply omit the separate step of creating a variable. Let’s use the example of party identification again to create PID2, which should be identical to PID1.
- Click Transform -> Recode -> Into Different Variables…
- Highlight the party identification variable (PARTYID) then click on the run arrow (>). This will move PARTYID into the box for Input Variable ! Output Variable.
- Under Output Variable, type PID2 in the box for name. For label, type Party Identification 2.
- Click Change.
- Click Old and New Values. This will take you into the screen for Recode into Same Variables: Old and New Values.
- On the left side of the screen, the box is labeled Old Value. In the box labeled Value, type the number of the value you wish to change. In the box labeled New Value, type the number of the value you want to be assigned for the response. Click Add after each old value has been assigned a new value.
- Once you have recoded the variable, click Continue. You will return to the previous screen. Then click OK. PID1 and PID2 should have exactly the same values.
Missing Values
There remains another step for getting our data ready for analysis. As we saw in part 4 of the tutorial, some variables have missing data. To prevent these value labels from skewing our data analysis, it is necessary to purge the missing data. Let’s use the variable for females staying home (FEHOME). This variable has five values assigned to responses:
- 0 = “NAP”
- 1 = “Agree”
- 2 = “Disagree”
- 8 = “Not Sure”
- 9 = “NA.”
As you will see below, GSS has already coded 0 and 9 as missing values. However, the value for “Not Sure” (8) remains in your data. If we do not assign “Not Sure” as a missing value, our mean for FEHOME will be 2.05 with a standard deviation of 1.19. After assigning it as a missing value, the mean will be 1.84 with a standard deviation of .37. This represents a sizable difference, particularly for our standard deviations.
- At the bottom left-hand side of the page, click on Variable View.
- Find the column for Missing. Move down the column until you find the box for FEHOME. Click on the box.

