System Administration
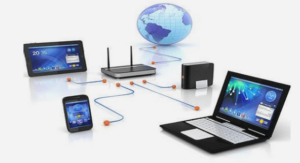
This chapter describes how to set up a printer and how to make the printer accessible to systems on the network by using Solaris Print Manager and the LP print service. For information on the procedures associated with setting up printers by using Solaris Print Manager, see “Setting Up Printing (Task Map)” on page 55. Solaris Print Manager is a Java-based graphical user interface that enables you to manage local and remote printer configuration. This tool can be used in the following name service environments: LDAP, NIS, NIS+, and files. You must be logged in as superuser to use this tool. You can use Solaris Print Manager to set up print servers (Add New Attached Printer or Add a Network Printer) and print clients (Add Access to Printer). An attached printer is a printer that is physically cabled to the print server. A network printer is physically attached to the network. You can use Solaris Print Manager to add an attached printer or a network printer. Adding access to a printer, or adding remote access, is the process of giving print clients (all those machines which are not the server) access to the printer. The following table describes each printer attribute to help you determine the information that is needed to set up a printer with Solaris Print Manager.
Solaris Print Manager checks user input for the various text fields in the input screens. There are two types of checking: general illegal input and input that is illegal for specific fields. To start Solaris Print Manager, either select Printer Administrator from the CDE Workspace menu or start the Print Manager from the command line. See the following procedure for details. Have a bitmapped display monitor, such as the standard display monitor that comes with a Sun workstation. Solaris Print Manager can be used only on a system with a console that is a bitmapped screen. Be running an X Window System, such as the CDE environment, or be using the remote display feature on a system running an xhost environment.
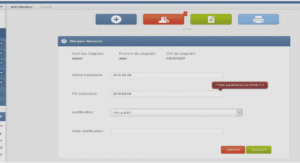
d. As superuser, log in to the system that runs Solaris Print Manager. Your NIS+ configuration might make it necessary to run the /usr/bin/keylogin command. For more information, see the keylogin(1) man page. When you add an attached printer or a network printer to a system, the printer is made accessible to the local system. The system on which you install the printer becomes the print server. The following procedure describes how to use Solaris Print Manager to add a new attached printer with the expanded printer support that is the default in this release.The printer definitions that you can assign with Solaris Print Manager include the use of PPD files. The Use PPD files option is available in the Print Manager drop-down menu in Solaris Print Manager. This default option enables you to select the printer make, model, and driver when adding new printer. This procedure shows you how to add a new attached printer by using Solaris Print Manager with the Use PPD files default option selected. To add a new attached printer without PPD files, you must first deselect this option in the Print Manager drop-down menu. For overview information about new or modified Solaris Print Manager features in this release, see “What’s New in Printing?” on page 25.
Consult the printer vendor’s installation documentation for information about the hardware switches and cabling requirements. When you are using Solaris Print Manager to create or modify a print queue, choose the files option as the name service. Select the Printer → New Attached Printer option from the menu. If the drop-down menu displays printer make and printer model, the new feature is working. To ensure that the RIP feature is working you need to create a new print queue by selecting one of the make/model combinations that is available in the New Attached Printer and New Network Printer screens used by Solaris Print Manager. Then, try printing to the new printer. If the output of the print job is recognizable, the RIP feature is working. If the output of the print job is unrecognizable, thenthe RIP feature is not working.

